Hydraulic fittings play a huge role in keeping equipment safe and leak-free. When someone notices leaks or damage, they should check for problems like pressure surges, corrosion, or hose kinking. In fact, hydraulic oil leaks cause most failures in high-pressure systems. Many trust Parker Hydraulic Fittings, hydraulic hose fittings, or stainless steel pipe fittings for reliability.
- Hydraulic oil leaks account for 70% of system failures in high-pressure industrial settings.
- Excessive pressure surges, corrosion, and hose kinking often cause these failures.
Key Takeaways
- Hydraulic oil leaks cause 70% of failures in high-pressure systems. Regular inspections can catch leaks early and prevent costly breakdowns.
- Always match the type and size of replacement fittings to the old ones. Use calipers and thread gauges to ensure accuracy.
- Proper alignment and torque during installation are crucial. Misalignment can lead to leaks, while incorrect torque can damage fittings.
Recognizing Faulty Hydraulic Fittings

Leak Indicators
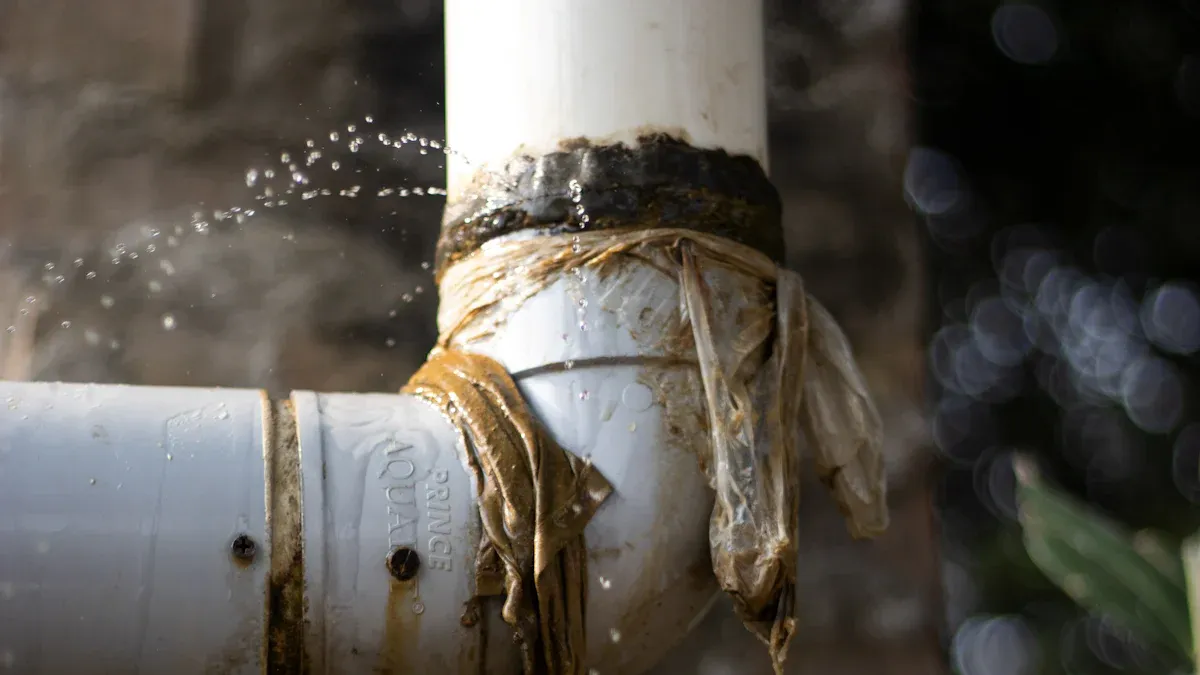
Spotting leaks early can save a lot of trouble. Many people notice fresh oil droplets or wet spots around hydraulic fittings. These signs often mean there is an active leak. Sometimes, dust sticks to slow leaks, making a dirty ring or patch near the fitting. Pools of hydraulic fluid under the equipment are another clear warning. Wet hoses close to the fittings may also show that the seal is not working right.
- Fresh oil droplets or wet surfaces around fittings
- Dust buildup patterns showing slow leaks
- Pools of hydraulic fluid under the fitting
- Wet hoses near fittings
Tip: If someone sees any of these signs, they should check the system right away. Quick action can prevent bigger problems.
Signs of Wear or Corrosion
Hydraulic fittings work hard every day. Over time, they can show signs of wear or corrosion. Regular checks help spot leaks, cracks, or worn spots before they get worse. Areas with lots of vibration or harsh weather need extra attention. Early detection keeps small issues from turning into big failures.
- Regular inspections help find leaks, cracks, or wear
- High-vibration or harsh environments need special care
- Early detection prevents major breakdowns
Note: People should look closely at fittings in places where machines shake a lot or face tough weather. These spots often wear out first.
Physical Damage
Physical damage can ruin hydraulic fittings fast. Sometimes, hoses get installed the wrong way or are not secured. This can cause them to rub against other parts, leading to cuts or tears. Using hoses that cannot handle the system’s pressure or heat can also cause them to fail.
| Type of Damage | Description |
|---|---|
| Abrasion | Hydraulic hoses can wear down in high-pressure areas. Cuts and tears from abrasion can quickly ruin the hose. |
| External Damage | Impacts, cuts, or crushing forces can damage hoses. This happens a lot on construction sites. Guards and sleeves help protect hoses from this kind of harm. |
- External damage can come from impacts, cuts, or crushing during use
- Heavy equipment can easily damage hoses if they are not protected
- Guards or sleeves help shield hoses, and good routing keeps them safe
Alert: Always check for signs of rubbing, cuts, or crushed hoses. Protecting hoses with guards can make them last much longer.
Inspecting and Diagnosing Hydraulic Fittings
Safe Visual Inspection
Technicians start by looking closely at each fitting and hose. They check for cracks, corrosion, or any visible damage. If a hose bends sharply or has a kink, it might fail soon. Friction can wear down hoses, so they look for spots where hoses rub against other parts. They also check if the hose matches the hydraulic fluid in use. Guards and covers should be in place and not broken. If they see fluid leaks or wet spots, that could mean trouble inside the hose.
| Safety Protocols for Inspecting Hydraulic Fittings in 2025 |
|---|
| Check for visible cracks, corrosion, or damage on the fitting surfaces. |
| Avoid sharp bends or kinks that could lead to hose fatigue and failure over time. |
| Inspect hoses for wear caused by friction against other surfaces or components. |
| Consider the recommended service life of the hose based on the manufacturer’s guidelines. |
| Ensure that the hose is compatible with the specific hydraulic fluid used in the system. |
| Inspect the hose routing to avoid potential crushing or pinching hazards. |
| Verify that any protective covers or guards are in place and intact. |
| Look for signs of fluid leaks or seepage, which could indicate internal hose damage. |
| Assess the overall condition of the hose and decide on its serviceability. |
Tip: A quick visual check can catch problems before they get worse.
Pressure Testing
Pressure testing helps find leaks and weak spots. Technicians use pressure gauges and flow meters to measure how well the system works. Hydrostatic testing uses liquid to spot leaks and works well for high-pressure jobs. Pneumatic testing is faster and fits gas systems, but it can be risky. Burst testing shows the maximum strength but ruins the fitting. Pressure cycling simulates real use and checks long-term performance. Leak testing is quick and does not damage the fitting.
| Method | Advantages | Disadvantages |
|---|---|---|
| Hydrostatic Testing | Accurate, easy to detect leaks, effective for high-pressure testing. | Requires the use of liquid, which may not be suitable for all environments. |
| Pneumatic Testing | Faster setup, suitable for gas-based systems. | Higher safety risks, less effective in detecting small leaks. |
| Burst Testing | Determines maximum strength and pressure limits. | Destructive; the fitting is ruined. |
| Pressure Cycling Testing | Simulates real-world conditions, ideal for evaluating long-term performance. | Time-consuming and requires specialized equipment. |
| Leak Testing | Non-destructive, quick, ideal for detecting minor leaks. | Does not assess overall strength of the fitting. |
Alert: Always follow safety rules when testing under pressure.
Identifying Fitting Types and Seals
Technicians use special tools to identify different types of hydraulic fittings. Calipers and thread gauges help measure the size and pitch of threads. JIC fittings look shiny and metallic, while SAE fittings have deep threads. NPT fittings taper at the end, and BSP threads stay uniform. Metric threads look like BSP but use metric units. ORFS fittings have a flat face with an O-ring. Reference charts and visual guides help match the fitting to the right type.
- Calipers measure fitting dimensions.
- Thread gauges check thread type and pitch.
- Visual guides show differences between JIC, SAE, NPT, BSP, Metric, and ORFS fittings.
Note: Using the right tools makes it easier to find the correct fitting and seal.
Removing Faulty Hydraulic Fittings
Depressurizing the System
Before anyone removes a fitting, safety comes first. Hydraulic systems hold a lot of pressure, even when the machine is off. If someone loosens a fitting too soon, fluid can burst out and cause injury. To stay safe, technicians always follow these steps:
- They make sure the system is off and disconnect any power sources.
- They wear personal protective equipment like gloves and safety glasses.
- They open the pressure release valve to let out any trapped pressure.
- They drain any leftover hydraulic fluid from the lines.
- They follow the manufacturer’s instructions for depressurizing the system.
Alert: Never skip depressurizing. Even a small amount of trapped pressure can cause a dangerous spray of fluid.
Clearing Obstructions and Cleaning
Once the system is safe, the next step is to clear away anything that might get in the way. Dirt, rust, or old oil can make it hard to remove a fitting. Technicians look for any debris or corrosion around the fitting. They use brushes or cloths to wipe away loose dirt. For tough grime or rust, they sometimes use a chemical cleaning process called pickling. This method uses acids like hydrochloric or sulfuric acid to remove rust and scale from metal surfaces. Clean fittings come off easier and help keep the system working well.
Tip: Cleaning before removal helps prevent dirt from getting inside the hydraulic lines.
Proper Removal Techniques
Removing hydraulic fittings takes patience and the right tools. Technicians follow a step-by-step process to avoid damage:
- They check the area and make sure it is clean and safe.
- They inspect the fitting for signs of corrosion or stuck parts.
- They choose the correct size wrench and apply steady, even pressure.
- If the fitting feels stuck, they use penetrating oil and let it soak in.
- For stubborn fittings, they use a longer wrench or a breaker bar for extra leverage.
- If threads get damaged, they use a thread chaser or repair kit.
Sometimes, fittings refuse to budge. The table below shows common problems and how technicians solve them:
| Challenge | Solution |
|---|---|
| Stuck or seized fittings | Apply penetrating oil, use a longer wrench, or carefully apply heat. |
| Leaking fittings | Find the leak, tighten gently, or replace worn seals. |
| Damaged or stripped threads | Use a thread chaser or repair kit, or replace the fitting if needed. |
Note: Using the right technique keeps the fitting and the hydraulic system in good shape.
Removing faulty Hydraulic Fittings is a careful process. Each step helps prevent injury and keeps the equipment running smoothly.
Selecting and Preparing Replacement Hydraulic Fittings
Matching Type and Size
Choosing the right fitting starts with matching the type and size. Technicians measure the old fitting using calipers and thread gauges. They check the thread type and make sure the new fitting matches the hose or port. Mistakes can happen if someone misreads measurements or skips double-checking. Sometimes, poor lighting or a bad angle makes it hard to see the numbers. Environmental factors, like dust or oil, can also affect accuracy.
Tip: Always double-check measurements and clean the area before starting.
Here’s a quick look at what matters most when picking a replacement:
| Criteria | Description |
|---|---|
| Pressure Rating | Each fitting type is rated for a specific range of pressure. |
| Material Compatibility | The fitting material must be compatible with the hydraulic fluid used. |
| Ease of Connection | Some fittings allow for quick and tool-free connections, while others require tools. |
| Leak Resistance | The ability to form a secure, leak-free connection is crucial. |
| Environmental Conditions | Factors like temperature and exposure to chemicals can impact durability. |
Choosing the Correct Seal or O-Ring
Seals and O-rings keep the system leak-free. The right material depends on the job. NBR works well with oils and most hydraulic fluids. Viton® handles high heat and harsh chemicals. EPDM resists water and ozone, making it good for outdoor use. HNBR stands up to high temperatures and pressure.
| Material | Advantages | Use Case |
|---|---|---|
| NBR | Great with oils and hydraulic fluids; works from -30°C to +120°C | Pumps, pistons, petroleum-based fluids |
| Viton® | Handles high heat and chemicals; works from -20°C to +200°C | High-pressure, chemical-heavy systems |
| EPDM | Resists water, steam, and ozone | Outdoor and water-based systems |
| HNBR | Handles heat and pressure well | High-temp, high-pressure systems |
Note: Always match the seal material to the system’s needs.
Preparing Replacement Parts
Before installing new parts, technicians inspect everything for cracks or dents. They check that the size and thread type match the system. Lubricating threads and O-rings helps with smooth assembly and prevents damage.
Steps to prepare replacement parts:
- Inspect all parts for damage or defects.
- Confirm size and thread compatibility.
- Apply the right lubricant to threads and O-rings.
A careful check now saves time and trouble later.
Installing New Hydraulic Fittings

Alignment and Positioning
Technicians know that good alignment prevents leaks and keeps the system safe. They start by making sure hoses and pipes line up with the fitting before tightening. Twisting or bending a hose sharply can damage the seal and cause trouble later. Hoses need enough space to move without rubbing against other parts. Clamps and supports help keep everything in place and stop hoses from sagging or shifting. Here’s a quick look at some alignment techniques:
| Technique | Description |
|---|---|
| Ensure Proper Routing | Hoses need clearance to move freely, avoiding contact with other surfaces. |
| Use Clamps and Supports | Clamps at key points prevent sagging and misalignment. |
| Check for Twists/Kinks | Twisted or kinked hoses restrict flow and wear out faster. |
| Ensure Proper Alignment | Pipes and hoses must line up with the fitting before tightening. |
| Avoid Twisting Hose | Sharp bends or twists during installation can break the seal. |
Tip: Careful alignment saves time and prevents leaks.
Applying Correct Torque and Sealing
Getting the torque right matters. Too much force can crack the fitting, while too little leaves gaps for leaks. Technicians use torque wrenches to tighten fittings to the manufacturer’s specs. For sealing, they pick the right compound or tape. Loctite 5452 thread sealant works well for NPT and JIC fittings, sealing at the mating surfaces and handling high pressure. Teflon tape should not go on NPTF or JIC fittings because it can cause contamination. For O-rings, a little hydraulic fluid helps them slide into place without damage. Technicians always check that the sealant matches the hydraulic fluid and system pressure.
Note: In high-vibration areas, extra sealing steps may be needed.
Double-Checking Connections
After installation, technicians double-check every connection. They look for cracks, leaks, or signs of wear. They match hose and fitting specs like diameter, pressure rating, and material. Pressure testing confirms that the new setup works as it should. Cleaning the work area and flushing the system removes dirt and keeps the hydraulic fluid pure. These steps help prevent future problems and keep the system running smoothly.
- Inspect hoses and fittings for leaks or damage.
- Verify compatibility by checking specifications.
- Perform pressure testing to confirm performance.
- Clean all parts and the workspace.
- Flush the system to remove any contaminants.
Alert: Double-checking connections protects equipment and keeps everyone safe.
Testing Hydraulic Fittings After Replacement
Re-Pressurizing and Leak Check
After installing new hydraulic fittings, technicians need to bring the system back to life. They always start by making sure the area is safe. Lockout/tagout procedures keep energy sources isolated. They check that all isolation valves are locked or monitored. Old hoses and O-rings never go back into the system. Fresh parts help prevent future problems.
Once everything looks good, technicians follow the manufacturer’s steps to slowly re-pressurize the system. They watch for any sudden movement or fluid release. Safety gear stays on until the job is done.
Detecting leaks is the next step. Technicians use several methods to find trouble spots:
| Method | Description |
|---|---|
| Visual Inspection | Look for fluid around fittings or on the ground. |
| Ultrasonic Leak Detectors | Listen for high-frequency sounds from small leaks. |
| Dye Injection | Add colored dye to trace leaks in hidden places. |
| Soap Solution Method | Apply soap; bubbles show where leaks hide. |
| Hydraulic Pressure Testing | Increase pressure to reveal leaks that don’t show at normal levels. |
Tip: Early leak detection keeps the system running smoothly and avoids costly repairs.
Verifying System Performance
Technicians want to make sure the system works like new. They check fluid levels and system pressure every day. Weekly, they look at pump performance and efficiency. Monthly, they inspect fluid quality and all major components.
A simple checklist helps:
- Check seals, hoses, valves, and reservoirs for damage.
- Test system pressure to match recommended levels.
- Inspect hydraulic fluid for dirt or contamination.
- Evaluate pumps and other parts for proper function.
If everything passes, the system is ready for action. Regular checks keep hydraulic fittings working well and help prevent breakdowns.
Identifying and replacing faulty hydraulic fittings becomes simple when technicians follow clear steps. They always use essential tools like hose cutters, pressure gauges, and cleaning supplies. Regular inspections and maintenance help prevent failures and reduce downtime.
| Benefit | How It Helps |
|---|---|
| Extended Lifespan | Professional installation lasts longer |
| Enhanced Safety | Strong seals prevent leaks |
| Cost Savings | Fewer replacements save money |
Routine diagnostics and careful installation keep hydraulic systems safe and reliable for years.
FAQ
How often should someone inspect hydraulic fittings?
Technicians check hydraulic fittings every month. Regular inspections help catch leaks, wear, or damage early. This habit keeps machines running safely and reduces repair costs.
What tools do technicians need to replace hydraulic fittings?
They use wrenches, calipers, thread gauges, and safety gear. Pressure gauges and cleaning supplies also help. The right tools make the job faster and safer.
Can someone reuse old seals or O-rings?
No, they should always use new seals or O-rings. Old ones may leak or fail. Fresh parts keep the hydraulic system reliable and leak-free.
Post time: Aug-28-2025
