
Installing a hydraulic hose coupling the right way means better safety and less downtime. Small leaks, even as little as three drops per minute, can waste over nine gallons of oil each year and cost more than $160. Take a look at how proper technique changes everything:
| Issue | Statistic | Impact |
|---|---|---|
| Contaminated lubricants | 80% of machine stoppages | Major safety and reliability risk |
| Improper hose fitting sizing | Nearly 30% of hydraulic hose failures | Common installation error |
| Case study: construction uptime | Uptime improved by 27%, hose lifespan doubled | Preventive maintenance boosts performance |
He chooses the right hydraulic hose connector, uses stainless steel pipe fittings when needed, and checks every hose coupling for leaks. She always follows the best steps for each installation.
Key Takeaways
- Choose the right hydraulic hose coupling by matching size, material, and pressure ratings to your system’s needs to prevent leaks and failures.
- Always inspect hoses and fittings carefully before installation and use proper tools and safety gear to ensure a safe, strong connection.
- Cut, clean, and deburr hose ends precisely to help couplings seal tightly and last longer under pressure.
- Use correct tightening methods and torque settings for each fitting type to avoid leaks and damage.
- Perform regular inspections and maintenance to catch wear or leaks early, keeping machines safe and running smoothly.
Hydraulic Hose Coupling Basics
What Is a Hydraulic Hose Coupling
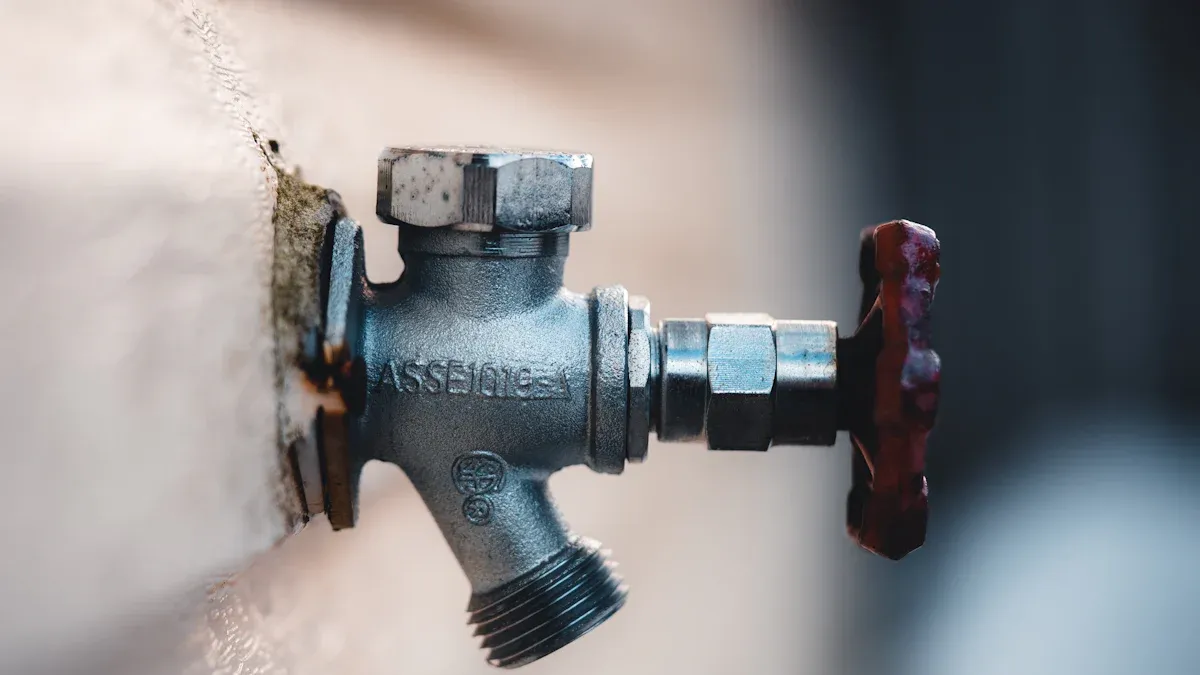
A hydraulic hose coupling connects a hydraulic hose to other components in a hydraulic system. It acts like a bridge, making sure fluid flows smoothly from one part to another. Each coupling has two main parts: the stem and the ferrule. The stem fits inside the hose, while the ferrule clamps around the outside. These parts must match the hose’s size and material. If they do not fit well, leaks or even hose bursts can happen.
Engineers design hydraulic hose couplings with strict specifications. They look at the hose’s outside diameter and the crimped coupling’s diameter. Even small differences in size can change how well the system works. Manufacturers test these couplings and hoses together as a system. They want to make sure the assembly lasts a long time and does not fail under pressure. Standards like SAE J517 set rules for hose construction and performance. Some companies go beyond these rules to make their products even safer and more reliable.
Tip: Always check that the hose and coupling are made to work together. Using parts from different brands can cause problems.
The Role of Couplings in Hydraulic Systems
Hydraulic hose couplings play a big role in keeping machines running safely and efficiently. They let workers connect and disconnect hoses quickly, which saves time during repairs or equipment changes. Many industries, such as construction, farming, mining, and manufacturing, rely on these couplings every day.
- Quick couplings help workers finish jobs faster.
- High-pressure couplings keep heavy machines safe.
- New designs make systems last longer and work better.
- Safety rules require strong, well-made couplings.
Research shows that using the right hydraulic hose coupling helps prevent leaks and accidents. It also keeps machines working longer without problems. Companies often talk to experts to choose the best couplings for their needs. This careful choice helps them follow safety rules and avoid costly breakdowns.
Selecting the Right Hydraulic Hose Coupling
Compatibility and Application Requirements
Choosing the right hydraulic hose coupling starts with understanding the job. Every system has its own needs. He checks the pressure ratings, temperature range, and fluid compatibility first. She looks at how flexible the hose needs to be and what kind of fluid will flow through it. If the hose and coupling do not match, leaks or failures can happen fast.
- Compatibility covers the hose’s inner tube, cover, fittings, and o-rings. All parts must work with the fluid inside.
- Pressure ratings matter. The weakest part sets the limit for the whole system.
- Abrasion resistance is key for hoses that rub against surfaces. Some covers last up to 450 times longer.
- Temperature ratings must fit both the fluid and the environment.
- Hose size affects how fast fluid moves. Too small, and the system slows down.
Tip: He always routes and clamps hoses to avoid kinks and sharp bends. This keeps the system safe and running well.
Material Selection and Pressure Ratings
Material choice makes a big difference. She picks couplings made from steel, stainless steel, or brass, depending on the job. Each material handles pressure and corrosion in its own way. Burst pressure testing, done by international standards, shows how much force a coupling can take before it fails. Most systems use a safety factor of 3 or 4, so the working pressure stays far below the burst point.
| Aspect | Details and Trends |
|---|---|
| Operating Pressure | Must meet or exceed needs; tested beyond EN and ISO minimums |
| Temperature Range | Couplings must match hose temperature ratings |
| Fluid Compatibility | Must work with all hydraulic fluids, including new biodegradable oils |
| Abrasion Resistance | High-resistance covers boost durability |
| Product Innovation | New designs improve efficiency and reliability |
She checks the manufacturer’s ratings and always follows industry standards. This keeps the system safe and reliable.
Sizing and Connection Types
Getting the size right is critical. He measures the inner and outer diameter of the hose. The dash size system helps match hoses and couplings. Tools like vernier calipers give accurate readings. He also checks the flow rate and pressure drop to pick the right size.
- Inner diameter controls flow speed.
- Outer diameter matters for fitting and clamping.
- Dash size uses sixteenths of an inch for easy matching.
- Nomograms help connect flow rate, pressure drop, and hose size.
- He picks the connection type—threaded, quick-disconnect, or flat face—based on the job.
She always considers the bend radius and flexibility. Tight spaces need hoses and couplings that can bend without damage. This careful sizing and selection prevent leaks, slowdowns, and safety risks.
Preparation for Hydraulic Hose Coupling Installation
Pre-Installation Inspection and Safety Checks
He always starts with a careful inspection before installing any hydraulic hose coupling. This step helps catch problems early and keeps everyone safe. A good inspection follows a clear process:
- He checks hoses, fittings, and connections for signs of wear, damage, or leaks.
- He uses pressure testing or ultrasonic testing to find hidden issues inside the hose.
- He reviews system specifications to make sure every part meets the right pressure and environmental ratings.
- She reads the manufacturer’s guidelines for troubleshooting and special instructions.
- They set up a regular inspection schedule based on how often the equipment runs and where it operates.
- They use inspection checklists to make sure nothing gets missed.
- They keep detailed records of each inspection, noting what they find and what actions they take.
Tip: A thorough inspection can prevent costly breakdowns and keep the team safe.
Gathering Tools and Safety Equipment
She knows that the right tools and safety gear make every job easier and safer. Many companies follow standards from the American Petroleum Institute (API) to guide their choices. These standards help workers pick the best equipment for each task.
- API issues hundreds of safety and equipment standards used across the oil and gas industry.
- API RP 54 covers safety for drilling and servicing, including risk checks and hazard controls.
- API RP 74 and RP 75 focus on safety in both onshore and offshore operations.
- These guidelines help teams choose the right gloves, eye protection, and tools for hydraulic work.
He always checks that every tool works well and that all safety gear fits properly before starting.
Preparing Hoses and Fittings
She lays out the hoses and fittings on a clean, flat surface. He checks that each hose matches the right length and diameter for the job. They clean the hose ends to remove dirt and debris. She inspects the fittings for cracks or rust. He lines up the hoses and fittings in the order they will be used. This careful setup helps the installation go smoothly and reduces mistakes.
Note: Clean hoses and fittings help prevent contamination and keep the hydraulic system running strong.
Step-by-Step Hydraulic Hose Coupling Installation
Cutting and Measuring the Hose
He starts by measuring the hose to the exact length needed for the job. She uses a tape measure or a digital measuring tool to get a precise reading. Advanced hose cutting machines help them make straight, clean cuts every time. These machines use real-time measurement tools, so they can check the length as they go. If they spot a mistake, they adjust the settings right away. This process keeps waste low and makes sure every hose fits perfectly.
- Automated cutting machines can cut hoses up to 50% faster than manual tools.
- Scrap rates drop from about 15% with hand tools to much lower with machines.
- Programmable controls let workers set the length for each hose, which saves time and reduces errors.
He always checks the hose material and thickness before cutting. Some hoses need special blades or settings. Regular maintenance and calibration of the cutting machine keep the cuts sharp and accurate. She knows that a clean, square cut helps the hydraulic hose coupling fit better and last longer.
Tip: Always double-check the hose length before cutting. A hose that is too short or too long can cause problems during installation.
Cleaning and Deburring Hose Ends
After cutting, she cleans the hose ends inside and out. Dirt or tiny bits of rubber can block the flow or damage the system. He uses a brush or compressed air to remove debris. They both know that a clean hose end is key for a strong seal.
Deburring comes next. He uses a special deburring tool or a file to smooth out any rough edges. Burrs or sharp spots can scratch the fitting or cause leaks. She checks the hose end for nicks, dents, or scratches. If she finds any, she fixes them before moving on.
- Proper cleaning and deburring lower the risk of leaks and system failures.
- Training and using the right tools make this step more effective.
- Skipping this step can lead to costly repairs later.
Note: Clean and smooth hose ends help the hydraulic hose coupling seal tightly and prevent leaks.
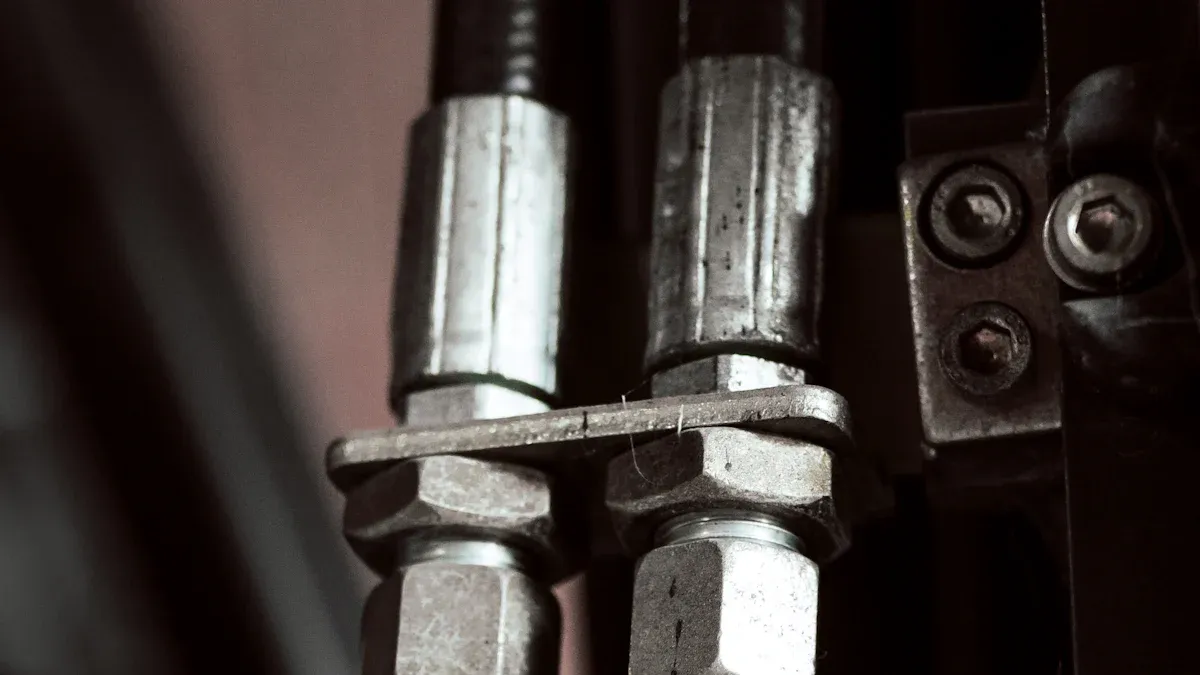
Assembling and Crimping the Coupling
Now, they get ready to attach the hydraulic hose coupling. He picks the right fitting and checks that it matches the hose size, pressure, and temperature ratings. She lines up the fitting with the hose and pushes it on until it reaches the insertion mark. Sometimes, he uses a soft mallet to make sure the fitting is fully seated.
Next, they place the hose and fitting into the crimping machine. He selects the correct die size for the job. She adjusts the machine settings to avoid a crimp that is too tight or too loose. They start the crimping process, making sure the force is even all around the fitting.
- They inspect the crimped coupling for any defects, misalignment, or irregularities.
- Visual indicators or calibrated tools help them check the crimp quality.
- After crimping, they perform a pressure test to make sure there are no leaks.
He always installs protective caps to keep dirt out until the hose is ready to use. She records the crimping details for future reference. This careful process helps the hydraulic hose coupling stay secure and leak-free, even under high pressure.
Callout: A good crimp means a safer, longer-lasting hydraulic system.
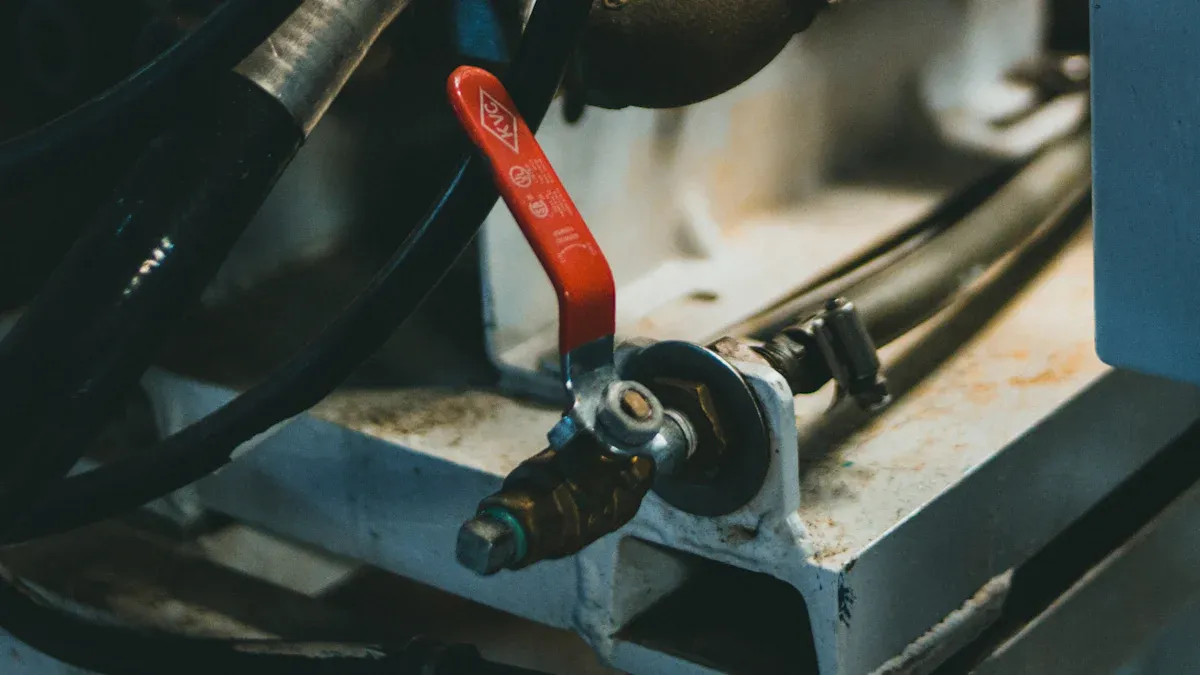
Proper Tightening and Thread Sealing
He knows that tightening a fitting is not just about using muscle. She always checks the type of fitting before she starts. Each fitting needs a special method to make a good seal and avoid leaks.
- O-ring face seal fittings need the right torque. He uses a torque wrench and follows the manufacturer’s chart. This pressure squeezes the O-ring just enough to stop leaks but does not crush it.
- Straight port threads also use O-rings. She tightens them to the recommended torque. Too much force can break the seal or damage the fitting.
- Tapered-thread fittings work differently. He starts by turning them finger-tight, then uses a wrench for a set number of turns. Over-tightening can crack the fitting or cause leaks.
- JIC 37° flare and bite-type fittings need a method called “flats from wrench resistance.” She turns the fitting until she feels resistance, then adds a set number of flats with her wrench. This keeps the metal-to-metal seal tight but not deformed.
He always checks his work with a few simple tests:
- He uses a torque wrench to check the force needed to move the fitting. This confirms the right amount of torque.
- She marks the fitting and the hose. If the marks line up after tightening, she knows the fitting is secure.
- He sometimes loosens and retightens the fitting to see if the torque matches the first time.
Tip: Marking fittings after tightening helps spot any loosening later. This small step can prevent leaks and failures.
She never forgets to use thread sealant or tape when the fitting type calls for it. He reads the manufacturer’s instructions to pick the right product. Some fittings need special sealants that work with hydraulic fluids. Using the wrong sealant can block the system or cause leaks.
Post-Installation Inspection
After installing the hydraulic hose coupling, he always checks his work. She starts with a careful visual inspection. She looks for cracks, wear, or leaks along the hose and fittings. He checks that all clamps and supports hold the hose in place.
They follow a step-by-step inspection process:
- She inspects the entire hose and coupling for damage or signs of leaks.
- He uses a pressure test. He runs the system at a higher pressure than normal to find weak spots.
- She checks that every fitting is tight and matches the torque settings.
- He runs the machine under normal conditions. He watches for leaks, strange noises, or movement in the hose.
They keep a log of every inspection. She writes down what she finds and any repairs made. He sets a schedule for regular checks. This helps catch problems early and keeps the system safe.
Note: Regular inspections and pressure tests help hoses last longer and prevent sudden failures.
She trains new workers to follow these steps. He uses the right tools and always follows the manufacturer’s guidelines. They route hoses to avoid sharp bends and use clamps to stop rubbing. She picks hoses that can handle heat, chemicals, and sunlight. He adds protective sleeves when needed.
Before replacing any hose, he makes sure the system has no pressure. She always follows the replacement schedule from the manufacturer. They handle hoses with care to avoid early damage.
A good inspection routine keeps the hydraulic hose coupling working well for a long time. It also keeps everyone safe and the machines running smoothly.
Safety Precautions and Common Mistakes in Hydraulic Hose Coupling Installation
Essential Safety Practices
Safety always comes first when working with hydraulic systems. He knows that even a small mistake can lead to serious injuries. For example, a case study tells about a technician who suffered a severe fluid injection injury. The problem started with an improperly torqued fitting that caused a pinhole leak. High-pressure fluid shot out, went through his skin, and caused permanent nerve damage. This story shows why correct torque and careful installation matter so much.
Hydraulic fluid can escape from tiny holes at speeds over 600 feet per second. Even at just 100 psi, the fluid can break the skin and cause hidden injuries. These injuries often look minor but can lead to tissue damage or even amputation if not treated right away. He always follows safety rules, wears gloves and eye protection, and checks for leaks before starting work. She makes sure to get proper training and uses the right tools for every job.
Safety audits help teams stay on track. They check if everyone follows the rules and if the equipment meets standards like ISO 45001. Audits include planning, gathering data, reporting, and making improvements. Training records and incident reports show if the team needs more practice or better tools.
| Audit Type | Purpose and Role in Validating Safety Practices |
|---|---|
| Compliance Audits | Check if the team follows health and safety laws and meets legal standards. |
| Program Audits | Review how well safety policies work in real life. |
| Internal Reviews | Find risks and help the team improve safety every day. |
Mistakes to Avoid During Installation
Many problems start with simple mistakes during installation. He sometimes sees over-tightened or loose fittings, scratched sealing surfaces, or O-rings that are not set right. These errors cause most leaks and failures. The chart below shows how often each mistake leads to trouble:
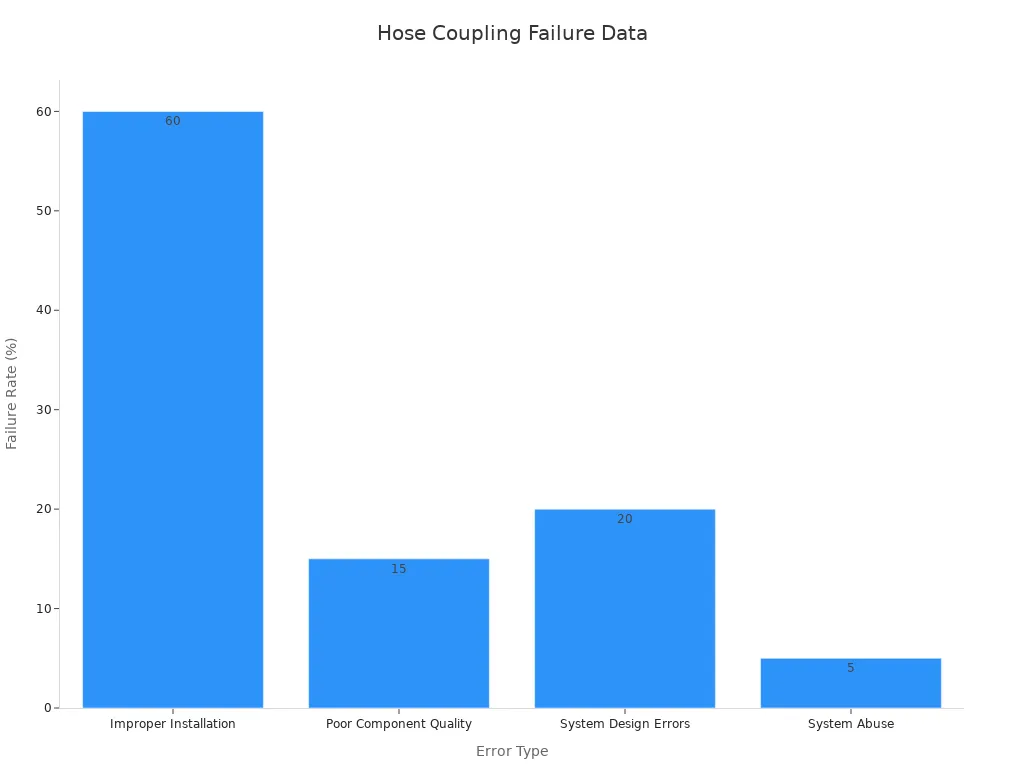
| Cause of Leakage/Error Type | Approximate Failure Rate | Common Mistakes and Notes |
|---|---|---|
| Improper Installation | 60% | Over-tightening, under-tightening, scratched surfaces, bad O-ring handling, wrong ferrule presetting. |
| Poor Component Quality | 15% | Using low-quality or fake fittings, poor machining, or plating. |
| System Design Errors | 20% | Bad routing, bending, or clamping; hard-to-reach fittings. |
| System Abuse | 5% | Not enough maintenance space, rough handling, or lack of training. |
She always uses high-quality parts and follows the best steps for each hydraulic hose coupling. He checks every fitting, uses the right torque, and never skips training. These habits help prevent leaks, injuries, and costly repairs.
Troubleshooting and Maintenance for Hydraulic Hose Coupling
Identifying and Fixing Leaks
He knows that leaks can sneak up on any hydraulic system. She starts with a visual check, looking for shiny spots, drips, or puddles under hoses and fittings. Sometimes, she uses a black light and special dye in the fluid. The dye glows under UV light, making even tiny leaks easy to spot. He listens for hissing sounds, which can mean high-pressure leaks. Ultrasonic detectors help find leaks inside hoses or couplings that eyes cannot see. Staff keep records of leaks and repairs, using tables to track which ones need fixing first. Training everyone to report leaks right away helps stop small problems from growing.
Tip: A proactive leak control program—detect, measure, and fix leaks—keeps costs down and machines running.
Inspecting for Wear, Damage, and Twisting
She checks each hose coupling for cuts, cracks, or bulges. He bends and twists the hose gently to see if it feels stiff or weak. They use a checklist to make sure nothing gets missed:
- Look for visible wear, cuts, or cracks.
- Bend the hose to test flexibility.
- Twist the hose to check for hidden damage.
- Check for signs of abrasion from rubbing.
- Test the hose under pressure to spot leaks.
- Inspect for heat, ozone, or sunlight damage.
- Flex the hose several times to test for fatigue.
If he finds any damage, he replaces the hose right away. She knows that regular testing helps catch problems before they cause a breakdown.
Ensuring Long-Term Reliability and Performance
He follows a strict maintenance schedule to keep the hydraulic hose coupling working well. She inspects hoses every three months or after 400 to 600 hours of use. In tough conditions, she checks even more often. They replace hoses every 2,000 to 3,000 hours, even if they look fine. He keeps the hydraulic oil clean and changes it on time, since dirty oil causes most failures. She tracks each hose’s life and records any repairs. Predictive maintenance helps them avoid surprises, cutting downtime by almost half. They always use genuine hoses and couplings that match the system’s pressure and temperature needs.
| Maintenance Task | Interval/Action |
|---|---|
| Visual inspection | Daily |
| Grease pivot points | Every 50 hours |
| Replace filters | Every 250 hours |
| Change hydraulic oil | Every 500 hours |
| Pressure test/replace hoses | Every 1,000 hours |
| Full pump/valve inspection | Every 2,000 hours |
| Preventive hose replacement | Every 2,000–3,000 hours |
Note: Tracking hose performance and sticking to a schedule helps prevent unexpected failures and keeps equipment safe.
He knows that every step matters when installing a hydraulic hose coupling. She follows best practices and checks her work often. They keep up with regular maintenance and never skip safety checks. Good habits help prevent leaks and keep machines running strong. Want a reliable system? Make safety and inspections part of every job.
Remember: A little extra care today can save big problems tomorrow.
FAQ
What tools does someone need for hydraulic hose coupling installation?
He needs a hose cutter, crimping machine, torque wrench, and safety gear like gloves and goggles. She also uses a deburring tool and cleaning brush. These tools help make the job safe and the connection strong.
How often should someone inspect hydraulic hoses and couplings?
She checks hoses every day for leaks or damage. He does a full inspection every three months or after 400–600 hours of use. Regular checks help catch problems early and keep machines running.
Can someone reuse old hydraulic hose couplings?
He should never reuse old couplings. Used couplings may have hidden damage or wear. She always installs new couplings to prevent leaks and failures.
What causes most hydraulic hose leaks?
Most leaks happen because of improper installation. She sees over-tightened fittings, damaged O-rings, or scratched surfaces. He knows that following the right steps helps stop leaks before they start.
How can someone tell if a hose needs replacing?
He looks for cracks, bulges, or leaks. She checks if the hose feels stiff or weak. If they see any damage, they replace the hose right away.
Post time: Jun-17-2025